Woodworking Tool Kit: Your Complete Guide to Building, Using, and Expanding with Ted’s Woodworking
Every serious woodworker starts with a solid foundation: a well-chosen woodworking tool kit. The right collection of tools helps you translate ideas into precise, durable pieces, whether you’re crafting a cutting board, a wall shelf, or a custom bed. In this guide, you’ll learn how to assemble a practical woodworking tool kit, what to prioritize at each stage, and how to grow your set as your projects grow in complexity. Along the way, you’ll find practical tips that keep your tools sharp, safe, and ready for action.
What makes a great woodworking tool kit?
Your woodworking tool kit is more than a bag of gadgets. It’s a cohesive system that supports accuracy, efficiency, and enjoyment in the workshop. When you choose tools with complementary capabilities, you reduce wasted time hunting for the right bit or sharpening stone. A thoughtful toolkit also keeps you flexible, so you can tackle items as varied as a simple shelf, a dovetailed jewelry box, or a complex plywood router job.
Core hand tools
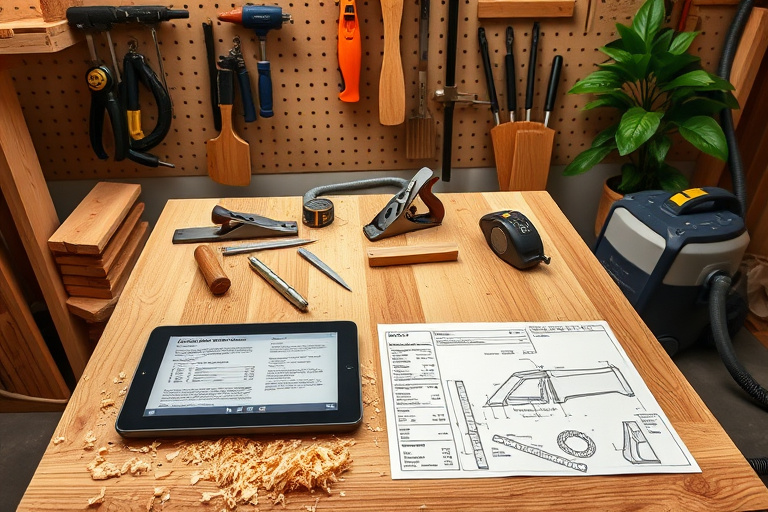
Hand tools form the backbone of a reliable woodworking tool kit. They don’t rely on electricity and are incredibly versatile for fine-tuning details and ensuring clean, precise work. Essential items include:
- Measuring and layout: a high-quality combination square, marking knife, marking gauge, and calipers for precise sizing
- Sawing and shaping: a fine-toothed backsaw, a hacking saw for non-wood materials, and a coarse-tooth hand saw for rough work
- Shaping and smoothing: chisels of multiple widths, a smaller mortising chisel, and aめplane or block plane for trimming and smoothing edges
- Hammering and driving: a reliable claw hammer and a slotted or non-slip mallet for assembly without marring wood
- Finishing touches: scrapers, sandpaper in multiple grits, and a sanding block or electric sander for even surface prep
Measuring and layout tools
Accurate cuts begin with precise marks. Invest in tools that feel good in your hand and stay true over time. Consider:
- Combination square with solid steel blade
- Marking gauge and marking knife for clean, repeatable lines
- Calipers or depth gauges for measuring internal dimensions
- A quality steel ruler and a tape measure for on-site checks
Power tools to consider
Power tools accelerate progress and broaden the kinds of projects you can handle. Start with a modest, reliable set and grow as needed:
- Drill/driver with a full set of bits for quick drilling and screwing
- Jigsaw or bandsaw for curved or irregular cuts
- Miter saw or track saw for accurate, repeatable cross-cuts
- Router for edge profiles, chamfers, and joinery features
- Dust extraction or a shop vacuum to keep the workspace clean and healthier
Safety gear and maintenance
A great toolkit is as much about safety and care as it is about capability. Prioritize protective gear and routine maintenance to protect yourself and your tools:
- Safety glasses or a face shield, hearing protection, and a dust mask or respirator
- Push blocks for table saw use, clamps for safe workholding, and guards on all tools
- Storage solutions: a sturdy toolbox, pegboard with labeled hooks, and a sharpening station
- Maintenance gear: sharpening stones, oil for blades, and a light oil to prevent rust
Essential items for beginners
If you’re just starting out, you don’t need to buy everything at once. A focused beginner’s woodworking tool kit can cover most entry projects and give you a clear path to growth. Build up gradually, prioritizing quality where it matters most:
- Two essential blades or saws: a fine handsaw for precise cuts and a universal blade for rough work
- A dependable drilling setup: a cordless drill with a few core bit sizes
- A small router or a set of basic router bits for edge work
- A light but sturdy workbench and a reliable vise to hold pieces securely
- Protective gear and a simple dust collection plan to keep the workspace comfortable
Upgrading your toolkit over time
As your projects become more ambitious, shift your toolkit from “starter” to “specialist” by adding tools that unlock new capabilities. Consider the following milestones:
- Upgrade to better blades, chisels, and planes with comfortable handles and durable steel
- Invest in a powered jointer or thicknesser if you work with wider boards or need consistent thickness
- Consider a stationary power tool like a small bench-top rod router or a compact CNC router for highly repetitive tasks
- Introduce jigs and clamps to increase accuracy and repeatability across multiple pieces
Getting the most from your woodworking tool kit
Having the right tools is part of the equation; knowing how to use them is the other. Here are practical practices that keep your woodworking tool kit performing at its best:
- Plan ahead: sketch the project, select the right blades and bits, and set up jigs before you start
- Maintain sharpness: regularly sharpen blades and edges; a sharp tool yields cleaner cuts with less effort
- Organize for efficiency: store tools by function and frequency, label for quick retrieval, and keep a clean work surface
- Dust management matters: dust slows you down and hurts airflow; invest in a simple dust collection system or vacuum
- Practice safe handling: always clamp pieces, use push sticks, and redirect power when changing setups
If you’re exploring ways to elevate your project quality, you’ll appreciate having a broader library of plans and guidance. For a curated collection of woodworking projects and detailed plans, many builders turn to Ted’s Woodworking. It can be a useful companion to your woodworking tool kit, giving you access to ready-to-build designs that fit a wide range of skill levels. Learn more here: Ted’s Woodworking.
Project ideas and resources
Feeling inspired? Here are two excellent resources that pair nicely with a well-rounded woodworking tool kit and a growing skill set. They offer practical blueprints, step-by-step instructions, and project plans you can reference while building in your shop:
For a detailed guide to a stylish, safe build that can anchor a bedroom or dorm room, check out the queen loft bed blueprints. This resource demonstrates how careful planning, precise measurements, and the right tool kit come together to create a statement piece that also saves space and improves safety in the room.
Another great source for creative, practical projects across skill levels is cool things to build with wood. It’s an excellent companion read for expanding your toolkit with new techniques, materials, and project ideas.
Ted’s Woodworking: a resource that complements your toolkit
While a strong woodworking tool kit gives you the hardware you need, a robust library of plans and guided projects fills the software side—showing you how to apply those tools effectively. Ted’s Woodworking offers a comprehensive collection of plans, diagrams, and instructions designed to help woodworkers of all levels complete impressive projects with confidence. If you’re serious about growing your capabilities, exploring Ted’s Woodworking can be a smart next step, especially when paired with hands-on practice using your toolkit. Access the program via the affiliate link above to explore the project library and starter ideas that align with your interests.
Maintenance and care for long-term performance
A long-lived woodworking tool kit relies on consistent maintenance. Simple habits keep blades sharp, surfaces smooth, and hardware from seizing up:
- Regularly clean blades and bits after use to prevent resin buildup and corrosion
- Sharpen edges as needed; a small honing guide can help maintain consistent angles
- Oil metal surfaces sparingly to reduce rust; wipe away excess to avoid staining wood
- Inspect each tool for wobble or looseness; tighten hardware and replace any damaged parts promptly
- Organize storage so heavier tools don’t crash into fragile items
Conclusion and next steps
Building a woodworking tool kit is a journey, not a single purchase. Start with core hand tools and a practical set of measuring and layout devices, then gradually add power tools, safety gear, and storage solutions. As you gain experience, you’ll learn which tools you use most and where your projects tend to push your limits. The goal is a cohesive toolkit that feels natural to you—one that expands as your ambitions grow. If you’re ready to explore more complex projects and planning resources, consider pairing your toolkit with a curated project library like Ted’s Woodworking and the two internal resource pages above. These choices can help you move from occasional hobbyist to a confident, capable woodworker who can take on ambitious builds with clarity and control.